Various winter storms have already ripped through multiple parts of the country necessitating the obvious need for working heating coils!! With conditions such as these, emergencies with your HVAC systems are almost inevitable. THIS is precisely when you need your coil supplier to have the speed and flexibility to be able to tackle whatever emergencies arise.
Of all the types of HVAC coils available, heating coils are probably the easiest to select and understand. Capital Coil has listed the three most common types of heating coils that you are likely to come across.
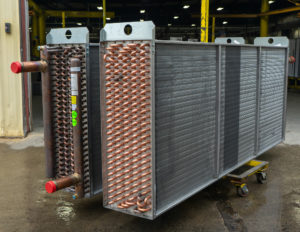
Hot Water Coils
When looking at a water coil, the first thing to remember is that it is in effect “dumb”. In other words, water coils do not know the temperature of the water moving through it. While standard HVAC water coils are mostly constructed in the same design, the number of rows contained within the coil is a key differentiator in determining if the coil is hot water or chilled water. 99% of all hot water coils are (1) or (2) rows based on performance requirements. The “Delta T” between the entering air temperature and the hot water temperature is very large. As a result, you only need a coil with (1) or (2) rows to do the job. Face velocities across the coil can be anywhere from 600 to 1,200 FPM (feet/minute), while water velocities are usually 2-4 FPS (feet/second). As a result, you will always end up with a (1) or (2) row coil with somewhere between 8-14 fins/inch.
Booster Coils
Hot water booster coils are just another variation of the standard HVAC hot water coil. They are always (1) or (2) rows as well, but the casing is designed for duct work installation. This basically means there is usually a 1” or 1.5” casing on all four sides of the coil. You select the proper size of the coil to make sure the air velocity across the coil is correct and simply transition the duct work to make the casing size around the coil. Generally speaking, the size of the coil face is larger than the duct size, so you must transition the duct to make it larger. Just remember, a booster coil is nothing more than a standard hot water coil that is used for duct work installation.
There can also be a casing variation called “slip & drive”, where the coil is installed in the duct work. The coil does not have the standard casing on all four sides like a flanged coil. Capital Coil’s selection program allows you to pick either option.
Steam Coils
The real secret to any steam coil installation is to know that steam coils are much more of a product of the entire system than any other coil; meaning that other coil types are much more independent of the system. Steam coils require numerous considerations, such as traps, pitched casing, piping flexibility, and vacuum breakers. Steam coils are also built according to steam pressure through the tubes and headers. 2 – 50 psig is considered “low pressure” steam for coils, while 50-100 psig is considered “medium pressure”. Anything over 100 psig is considered “high pressure” steam. An important fact to remember is that each of these categories requires a separate kind of construction with different brazing and different materials. Additionally, almost all steam coils are (1) or (2) rows deep. Steam coils are known either as “standard” steam or “steam distributing”, but the differences are very easy to understand. Outside air temperatures below 40˚F require that you have a “non-freeze” steam distributing coil.
RELATED POSTS
Stock Hot Water Coils – Quick Buyers Guide


